Hi everyone! This is the second part of the blog series talking about enabling Private Network Deployment in Veeam Backup for Azure.
We have already discussed in the
previous post about how to complete the initial configuration in Azure and Veeam to use Private Network Deployment. In this post, we will discuss about how to configure all the required components
to backup Azure VMs using Private Network Deployment.
Create Private DNS Zones
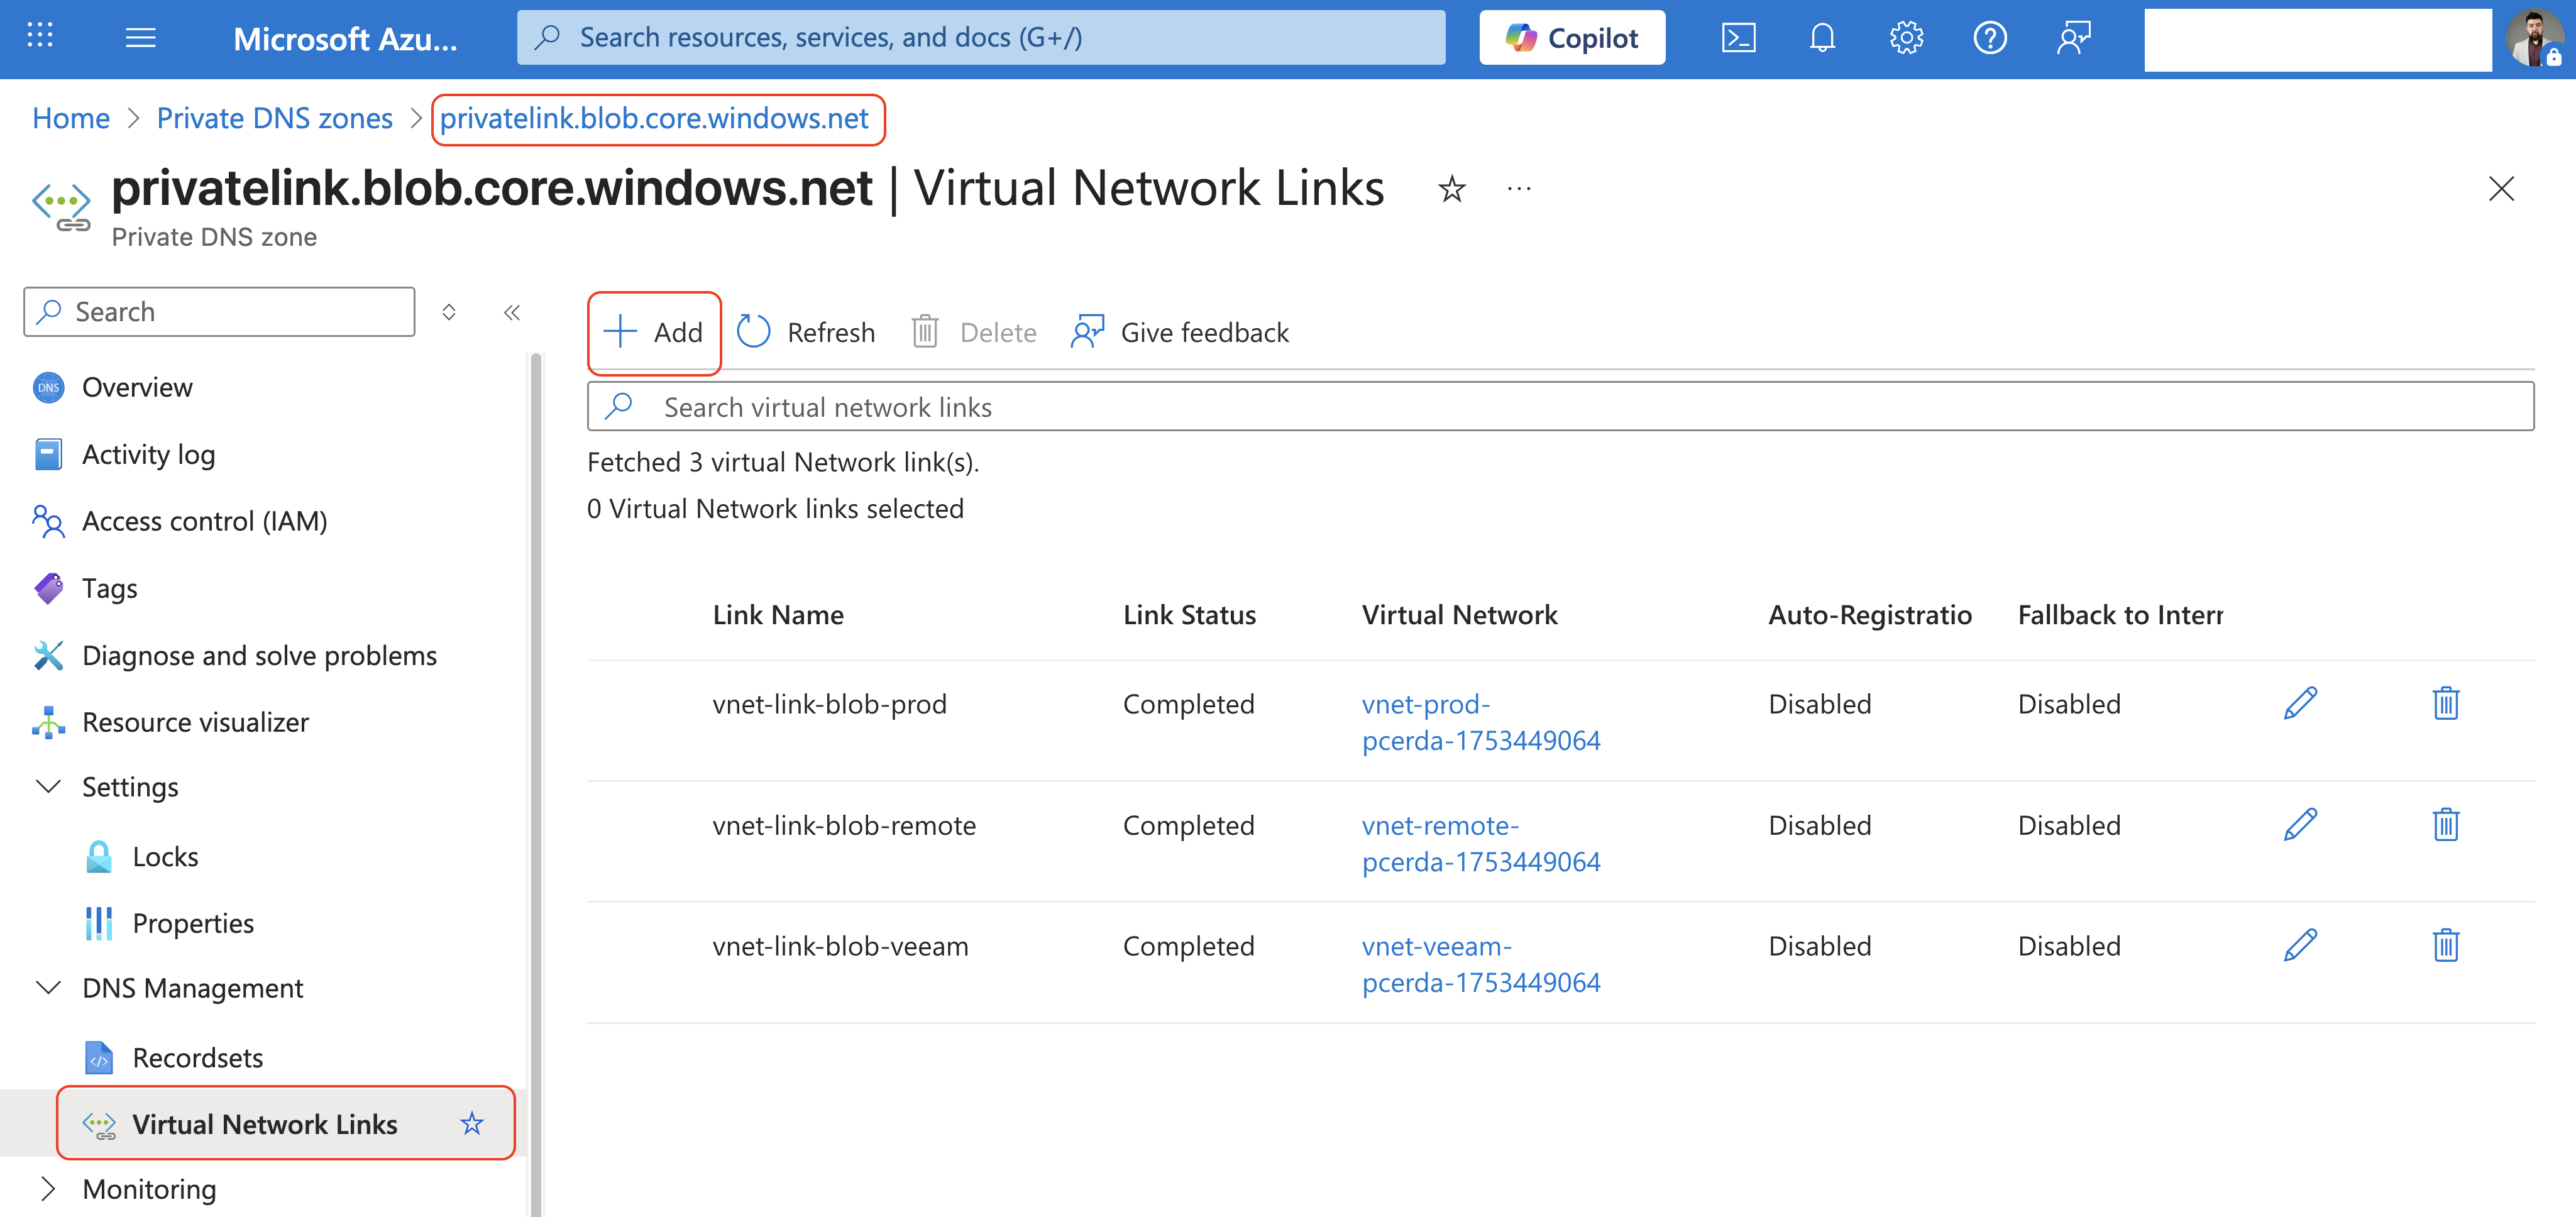
The first step will be to create two Private DNS Zones in Azure named privatelink.blob.core.windows.net and privatelink.queue.core.windows.net as described in Microsoft Docs. It is recommended that you create the DNS zones in the same resource group where the backup appliance resides, to simplify resource management.

Then, you must add the VNET to which the Backup Appliance is connected and the VNET used by the Workers to both DNS zone. Steps are described in the
Veeam official documentation. In my case I’ve added 3 VNETs:
- The VNET used by Veeam components in Region A
- The VNET used by Production VMs in Region A
- The VNET used by Production VMs in Region B
Create and launch a Backup policy
Now, we need to create and launch a backup policy in Veeam for Azure, to protect at least 1 Azure VM.
Consider that the backup policy is launched at this step only to automatically create and configure Veeam storage accounts and private endpoints that will further be used for backup operations.
As soon as Veeam Backup for Azure performs the necessary configuration steps, the policy will fail as some additional manual configuration actions with the private endpoints will still be required.
Wait for the Backup Policy to fail, and move to the next step.
Configure Private Endpoints
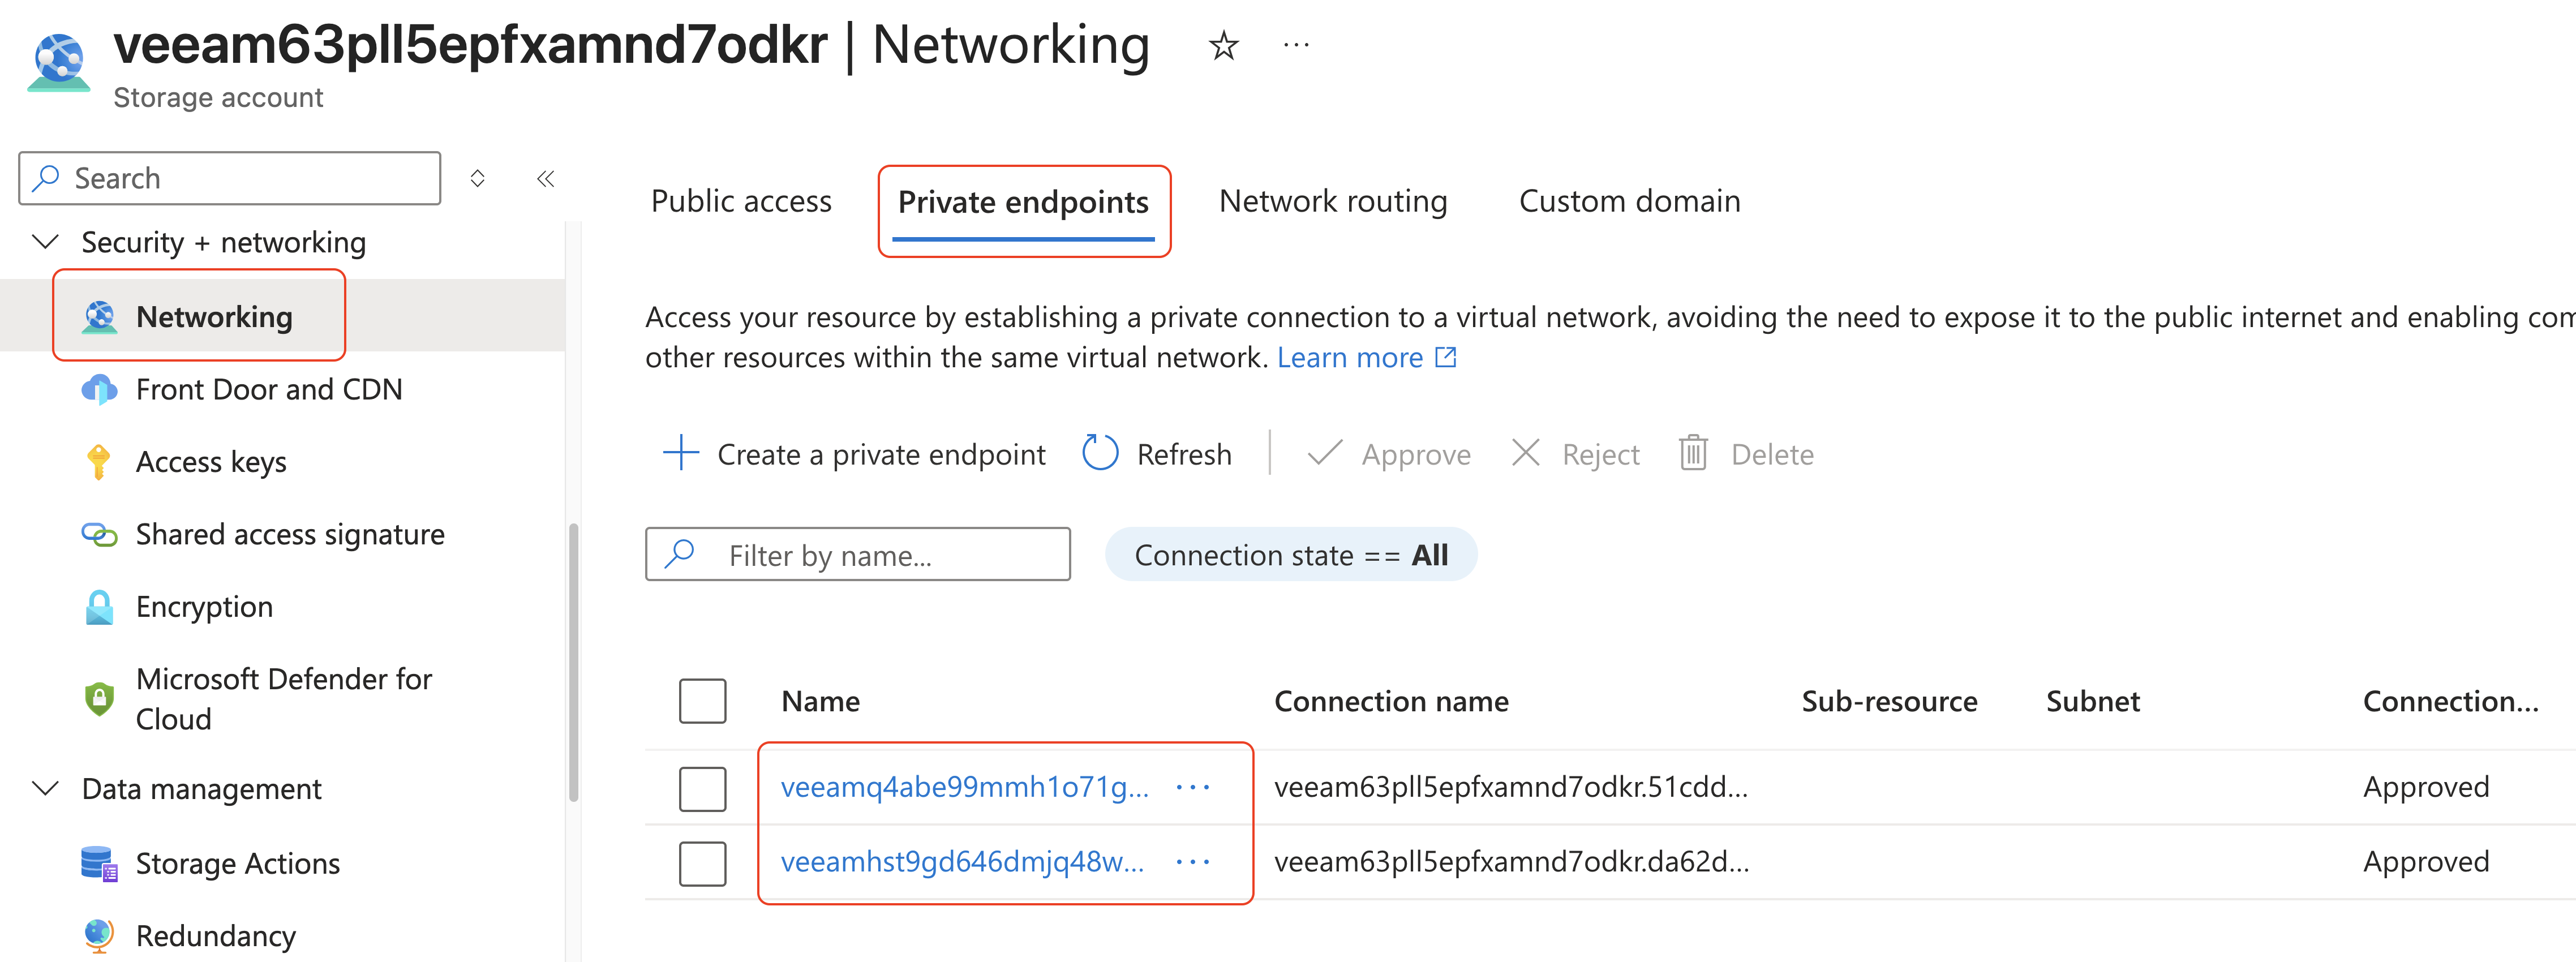
After running the Backup Policy in the previous step, Veeam will create the required Azure Storage Accounts and Private Endpoints for Veeam to work in a Private Network Deployment. So, for Veeam Backup Azure to be able to establish private connections with the protected Azure VMs, you must configure DNS settings for those Private Endpoints.
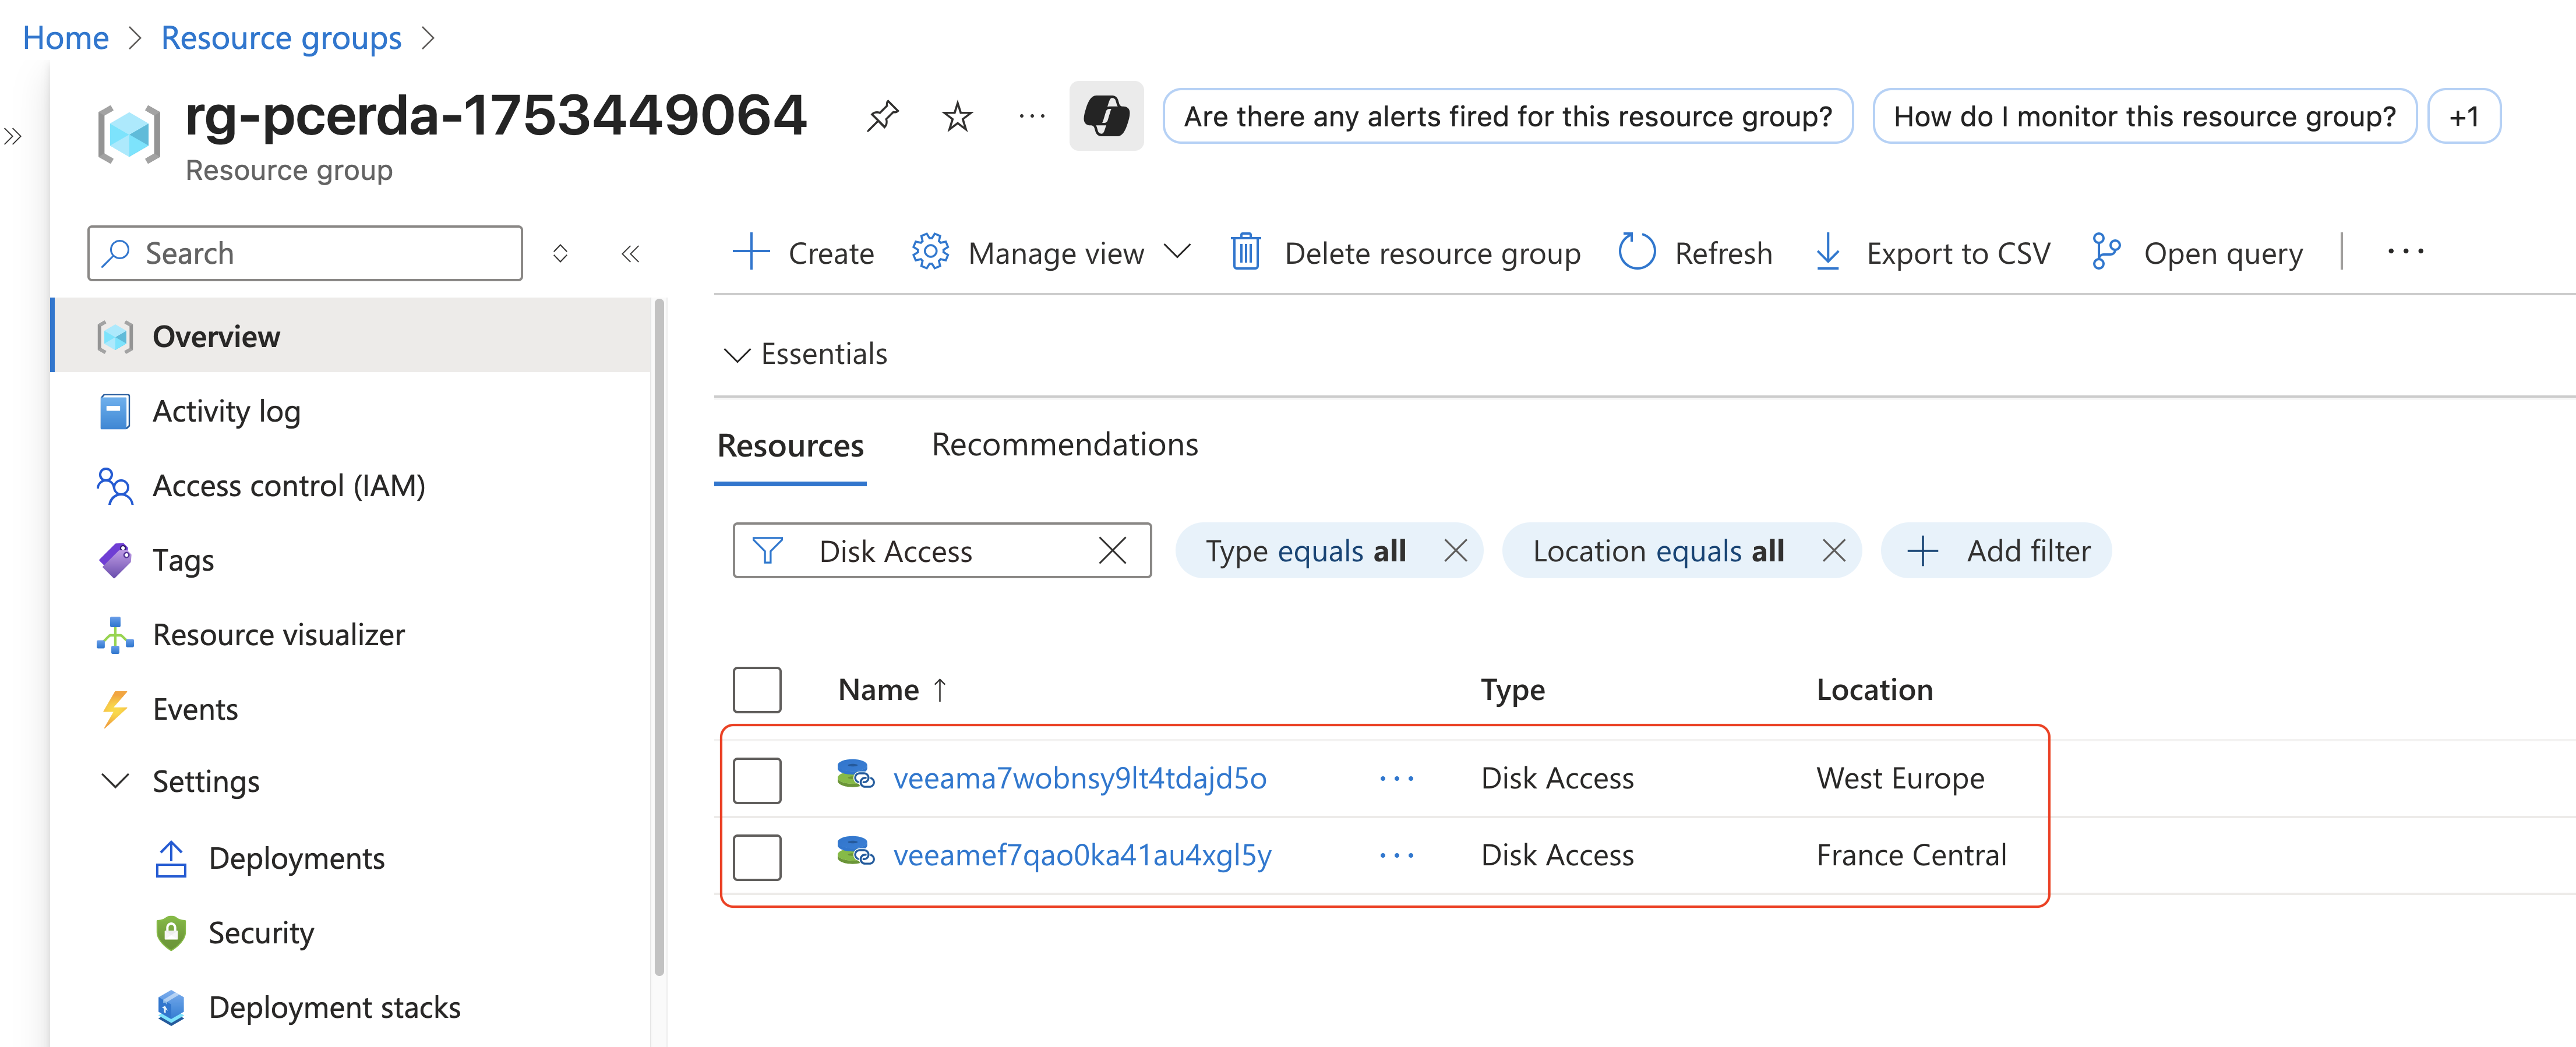
In the Azure Resource Group you have deployed all Veeam components, look for a new Storage Account with a random name that should look like the ones in the following image.
IMPORTANT: Note that Veeam will create 1 Storage Account for every region where we have configured a Worker. In
our example, we are going to protect Azure VMs running on 2 different regions, so we have Workers configured for those both regions, thus Veeam has created 2 Storage Accounts as you can notice in the image above.
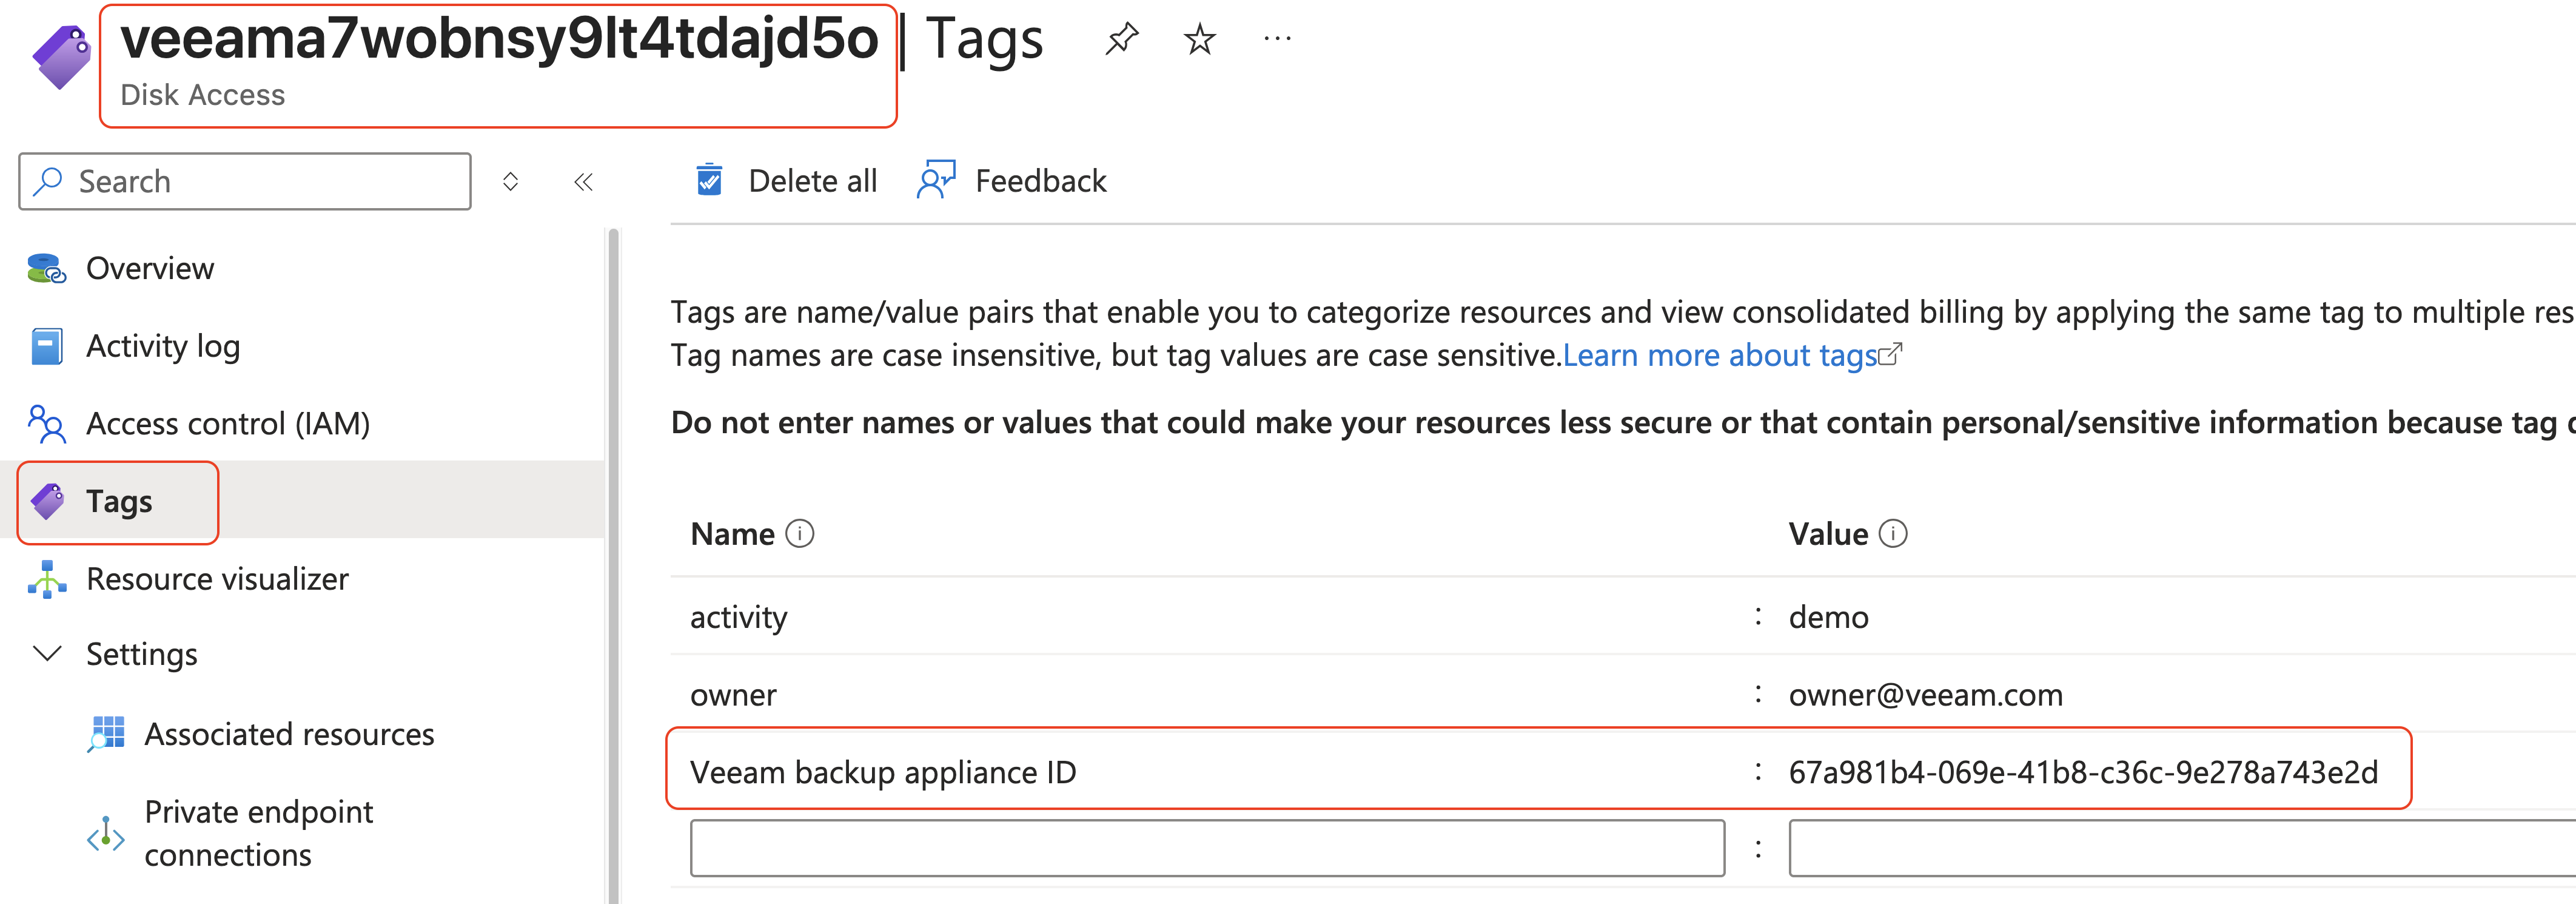
These Storage Accounts are assigned the Veeam backup appliance ID tag as you can see in the following image.

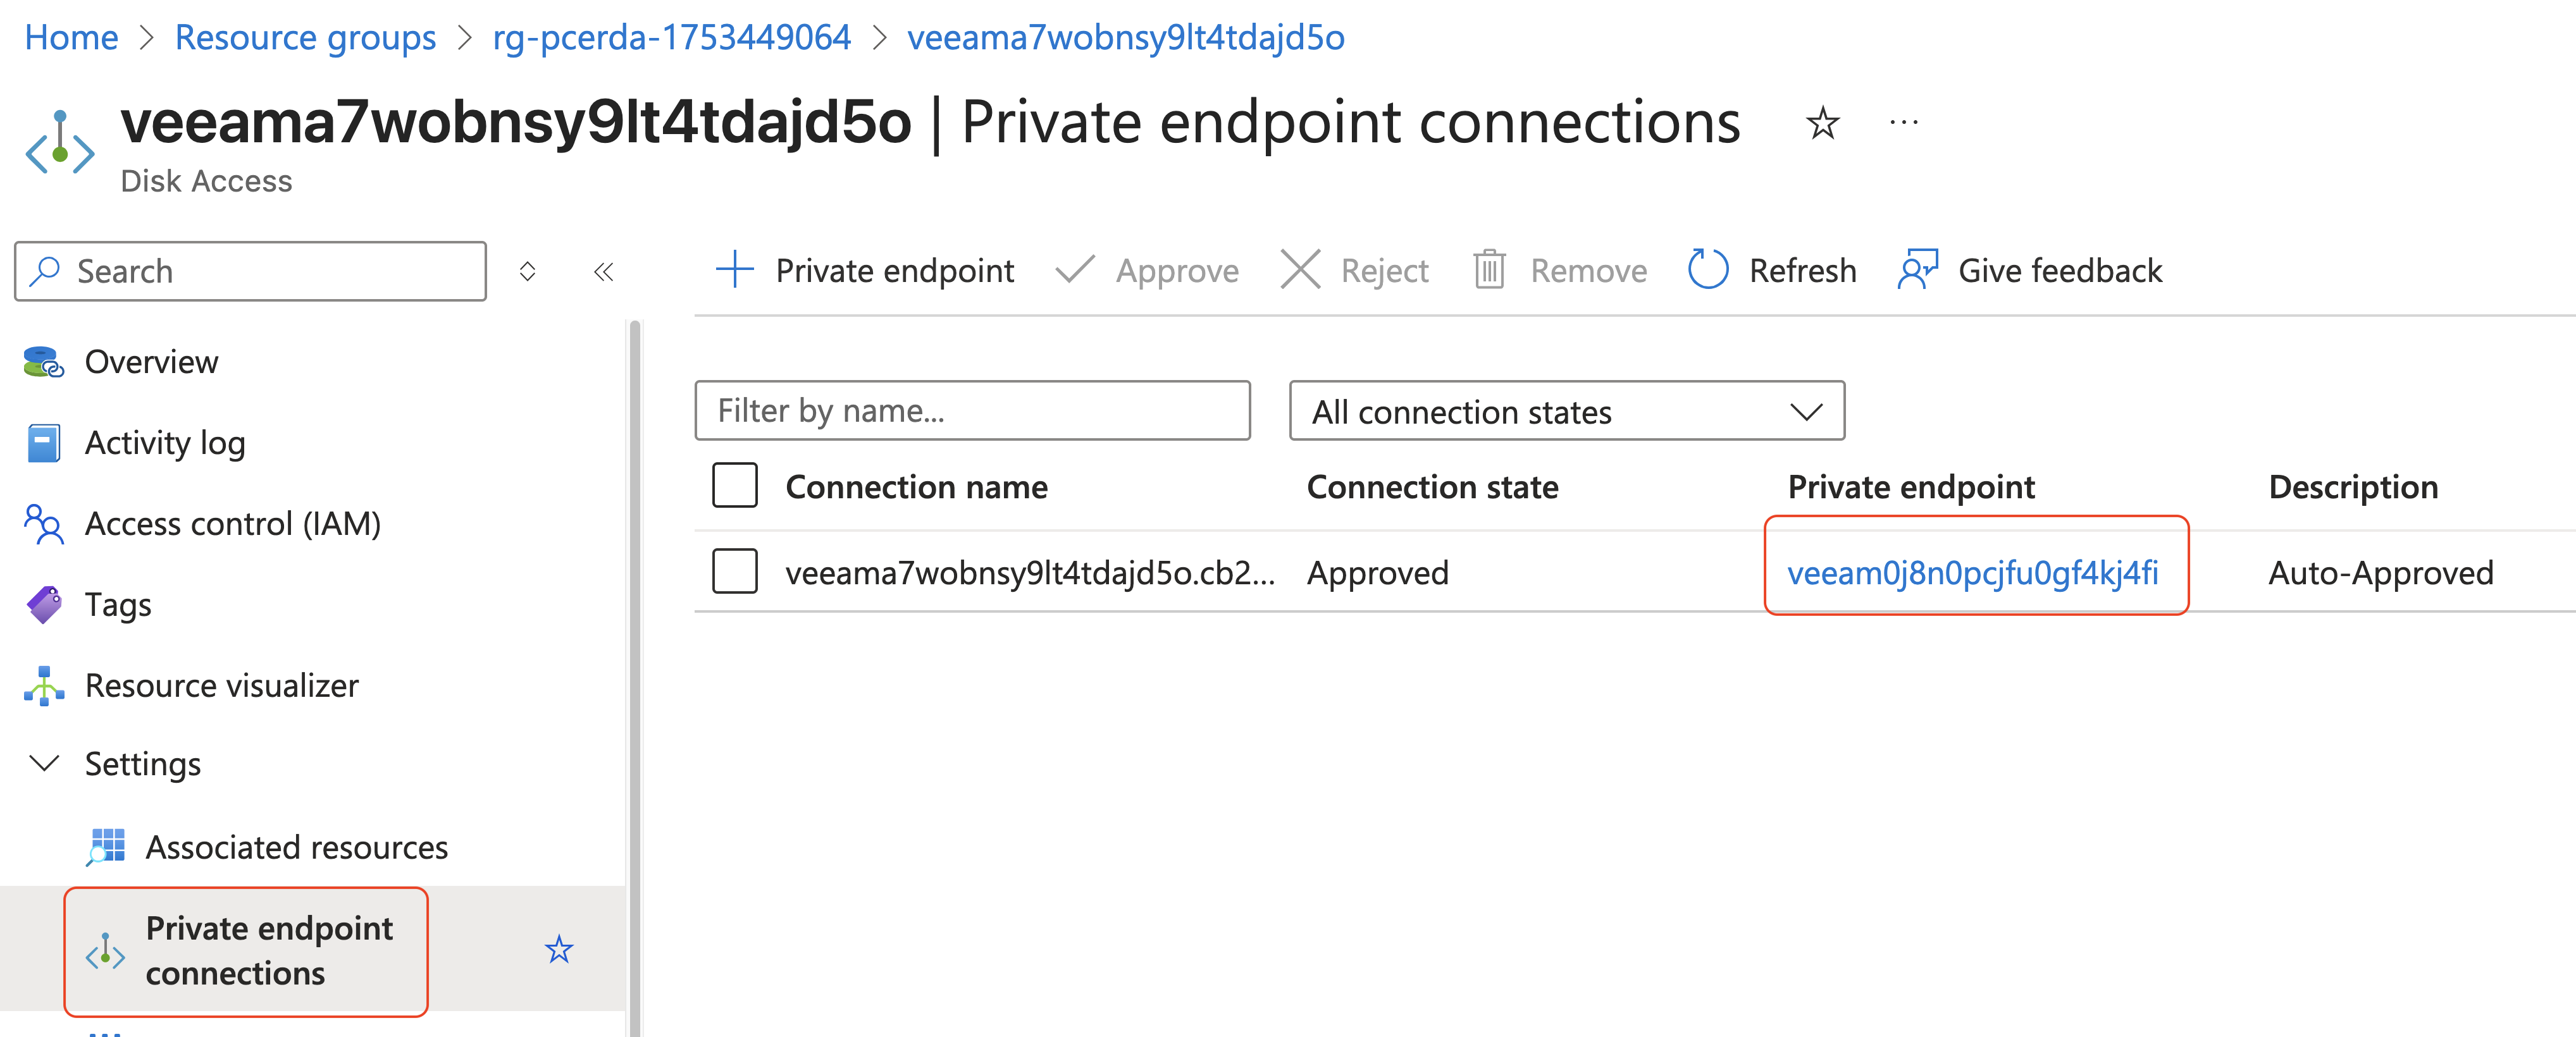
Now, we need to configure the Private Endpoints for every Storage Account created by Veeam.
- For every Storage Account we have 2 Private Endpoints, one for Blob and the other one for Queue.
- We have to configure both.
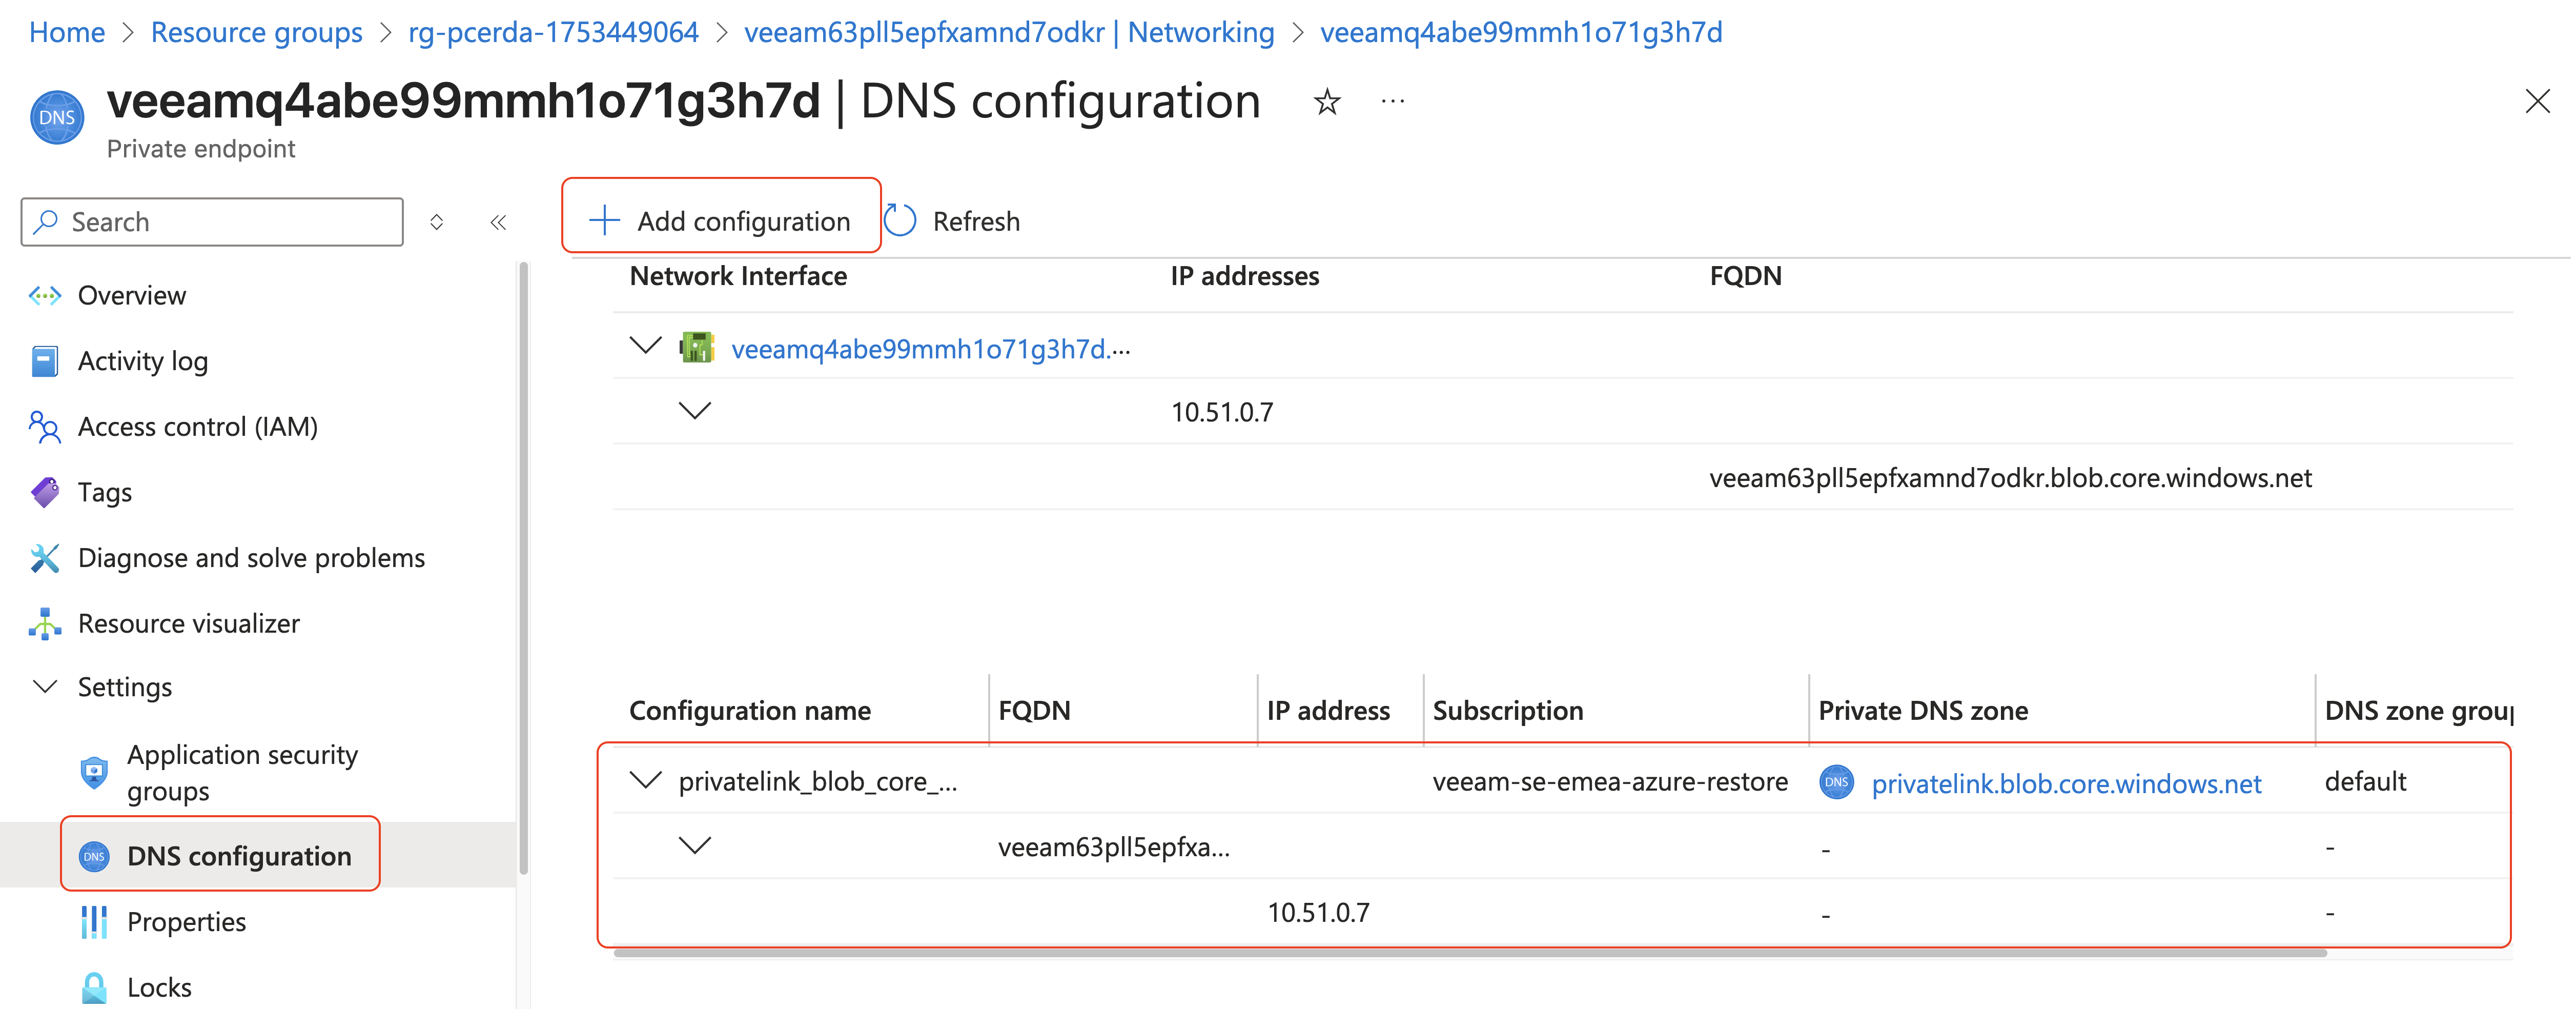
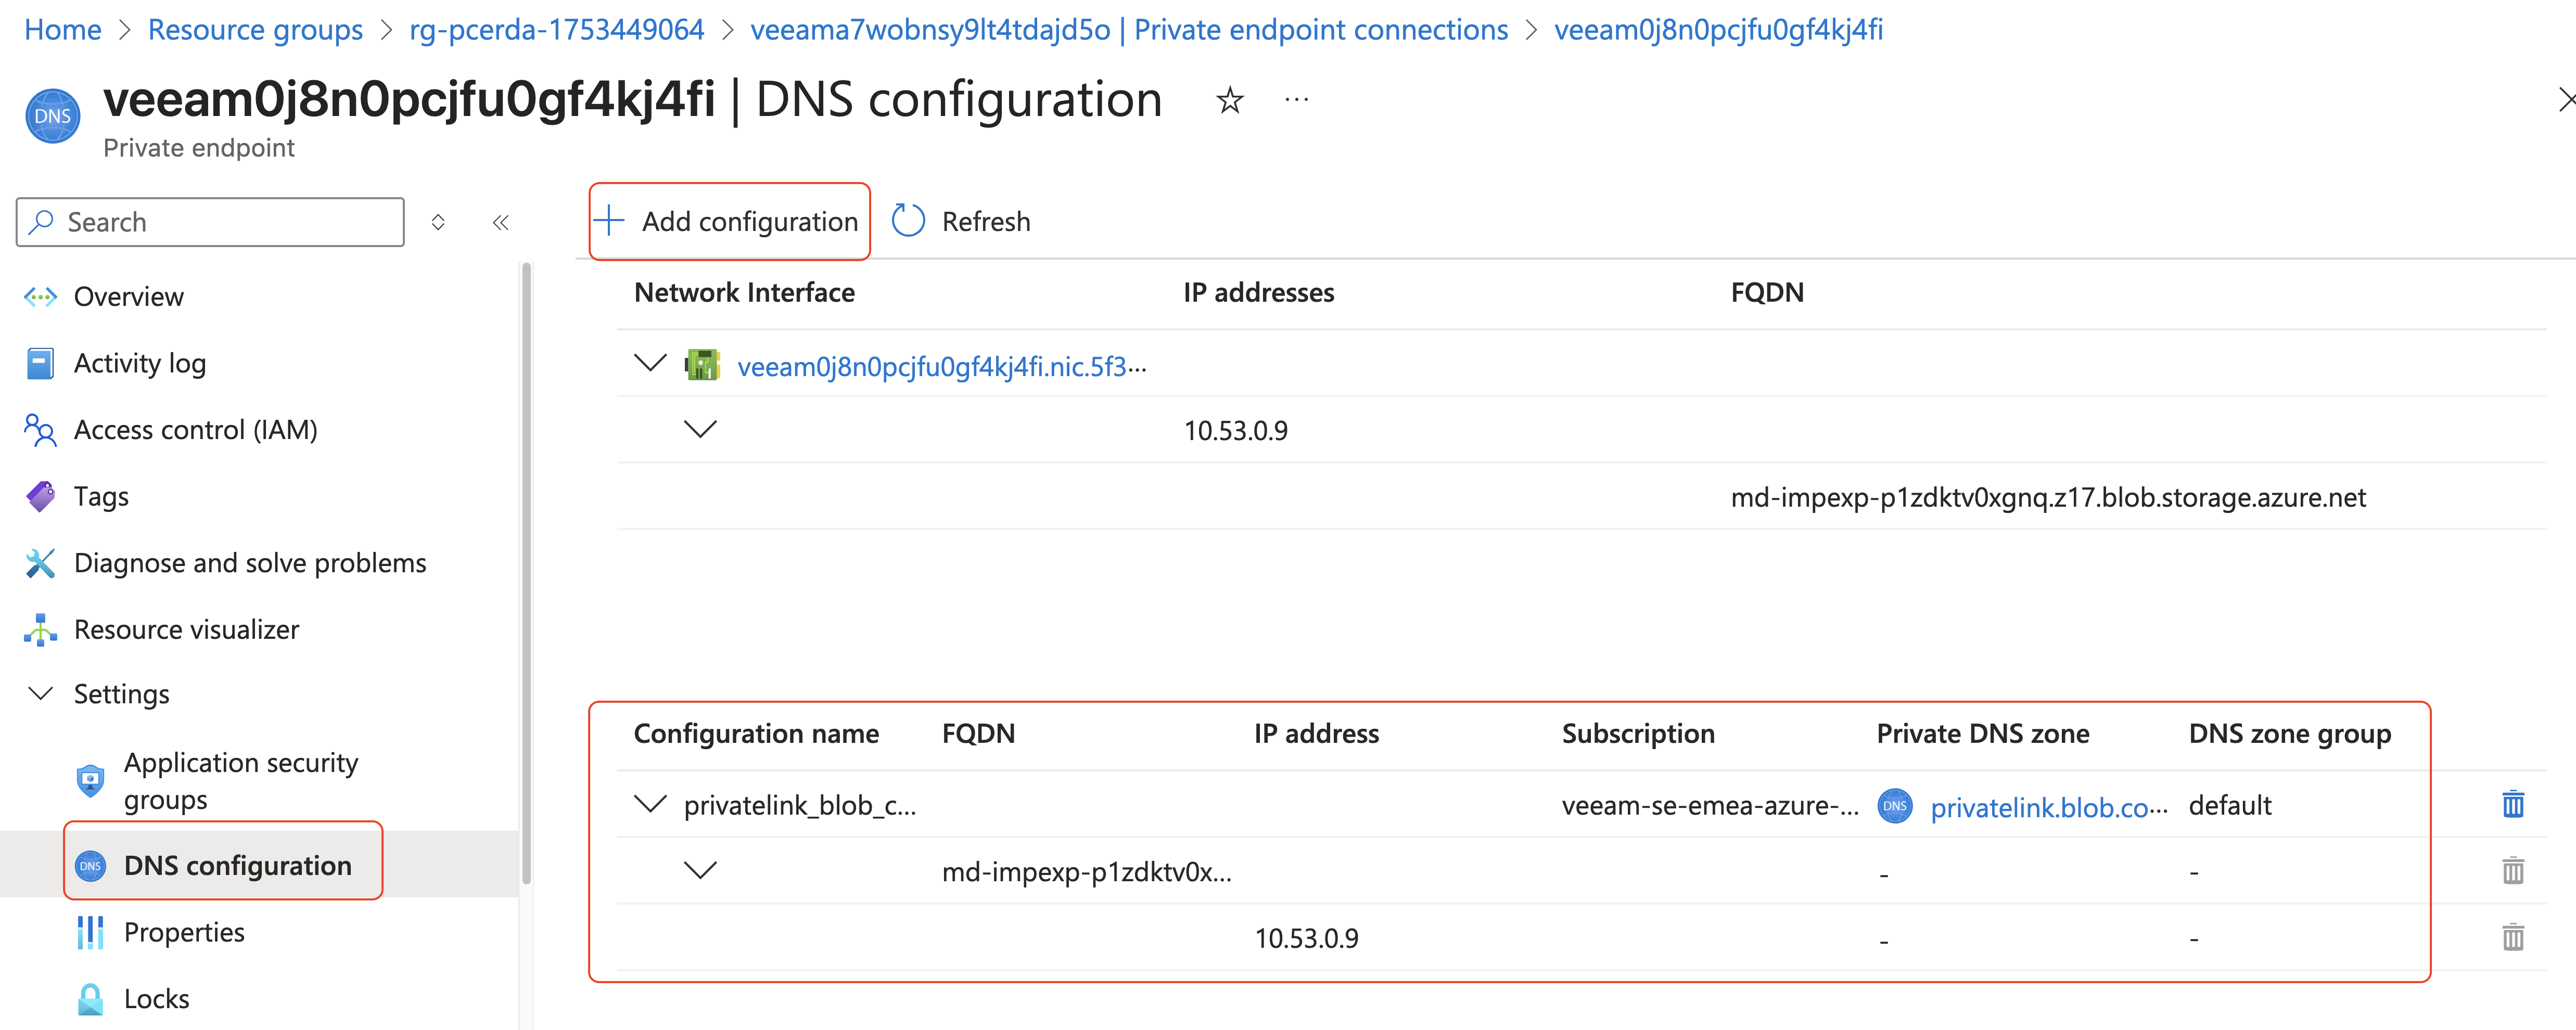
To do so, we click in the name of the first Private Endpoint in the list as you can see in the image above. In the Private endpoint window, navigate to Settings > DNS Configuration and click Add configuration. Then you follow the steps described in Veeam documentation to add a Private DNS Zone. The final configuration should look like the one in the following image:
You have to follow these steps for both Private Endpoints created (blob and queue) for every Storage Account.
Launch the Backup policy again
Now, we need to launch again the Backup Policy that we have created and launched before.
Consider that the backup policy is launched at this step only to automatically create and configure Veeam Disk Access resources that will further be used for backup operations. As soon as Veeam Backup for Microsoft Azure performs the necessary configuration steps, the policy will fail as some additional manual configuration actions with the disk access resources will still be required.
Configure the Disk Access resource
Veeam will create a Disk Access resource with a Private Endpoint for every region where we have configured
Workers as described in the previous post. This Private Endpoint will be used later when the Worker is getting the VM data from Snapshot when running the Backup policy, using a SAS URI.
In our case, as we have VMs and Workers in 2 different Azure Regions, Veeam has created 2 Disk Access resources, so the following steps should be followed for both.
We click in the first Disk Access resource, and confirm that the Disk Access has the Veeam backup appliance ID tag, as you can see in the following image.
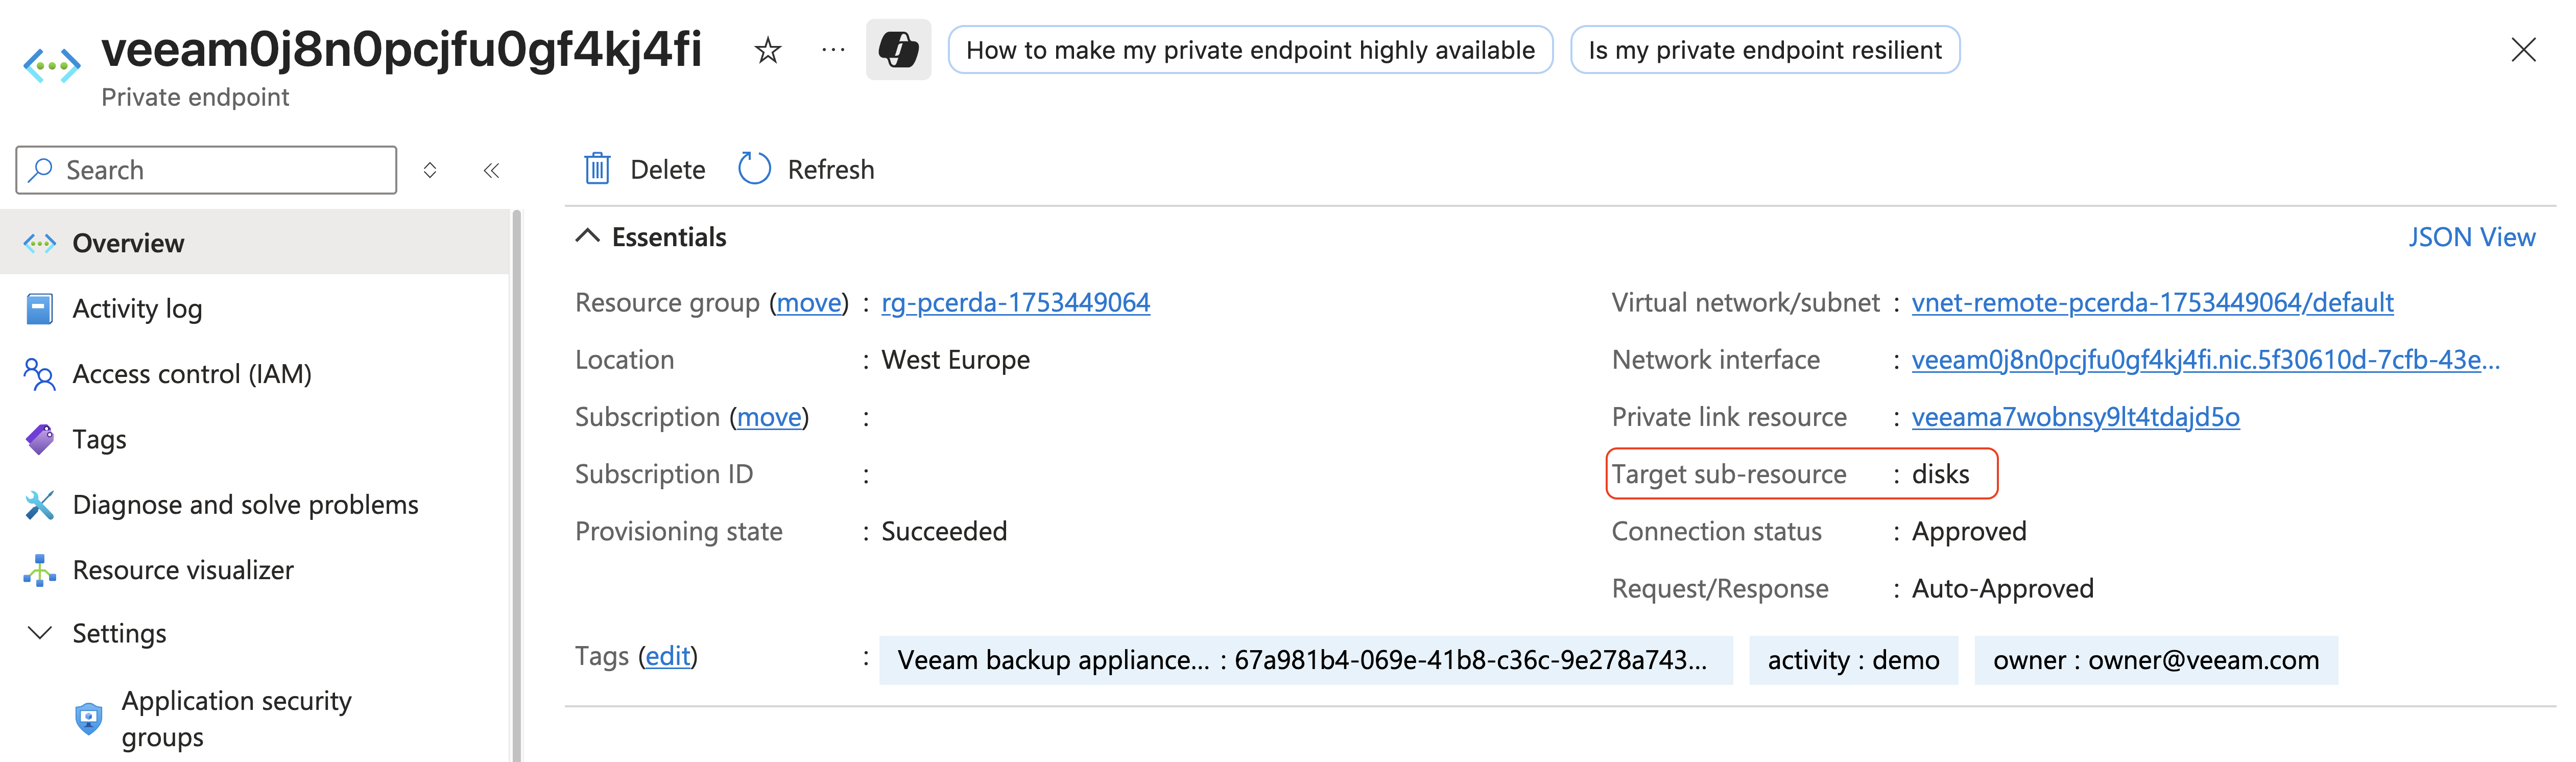
Click in Private endpoint connections and locate the private endpoint created for disk access. Then click the link in the Private endpoint column.
The private endpoint for disk access will have the disks value set in the Target sub-resource field.
Finally navigate to Settings > DNS Configuration and click Add configuration. Then you follow the steps described in
Veeam documentation to add a Private DNS Zone. The final configuration should look like the one in the following image:
Launch the Backup policy one more time
Now, we need to launch again the Backup Policy that we have created before to make sure that you have configured all the required settings correctly.
Consider that as soon as the backup policy completes successfully, Veeam Backup Azure will start regularly updating the worker instances. However, for Veeam to be able to install the updates, the Workers will require public access to the online Ubuntu repositories listed in Veeam documentation.
This post has become long enough, so in the following post we will explain in detail how the Azure VM backup process works with Veeam Backup for Azure, where I’ll describe how all the components created and configured so far work together. See you next time!!!


Get Social